


We were so excited make this set of D Nealian Sandpaper Letters!
I printed our template from here and she has even reversed the letters, so all you need to do is print them off. She also did us the favour of placing them very frugally on two sheets of paper as to only use two sheets of sandpaper. I chose red sandpaper for all the letters,by 3M.I did not want to paint my boards (made of smooth both sides Masonite) red. I did paint my vowels boards blue. A typical early Montessori Moveable Alphabet has blue vowels and red consonants. If you are using these for writing practice on their own aside from the curriculum they do need to be colour coded. The vowels are highlighted during Pink Series work only.
I used a glue stick to place the template on the back of the sandpaper, and then cut them out. I used an exacto blade to cut the centres of a...b...etc.
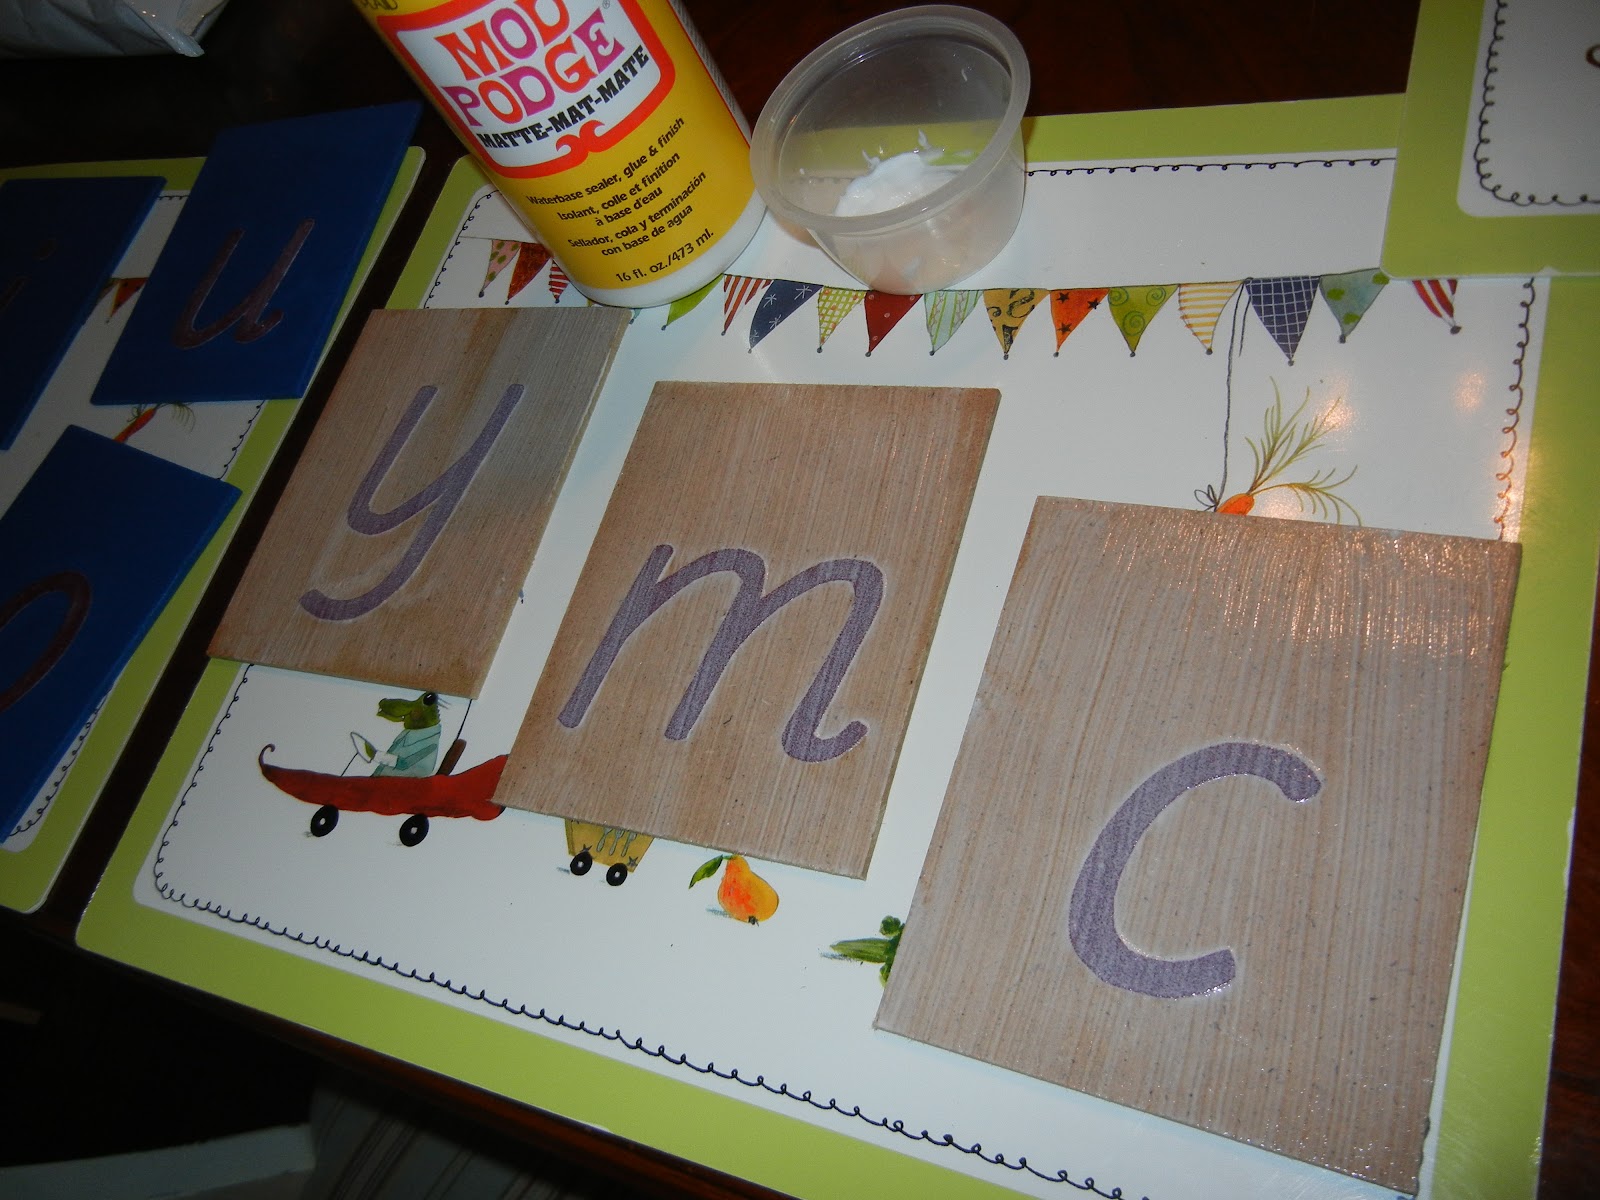
We used wood glue with a small brush to glue the letters to the cards. Then with a foam brush we sealed them with Modpodge. This does two things...makes them wipe-able and seals the sandpaper to keep the grains of sand from rubbing off.
Modpodge does not adhere to glossy paint, so we just coated the letters on the blue boards.
If I were to do this again I would use spray sealer over all of the cards as it's easy and works so well.

This project is very easy to do. My husband made the double compartment box.
I will also make a set of cursive in the event that my children are keen to learn.
*Update* We have found that the Modpodge marks fairly easily on the sandpaper portion of the cards, in that scrapes go a milky colour. To avoid this clear coat the cards.
Finding the fonts has become a bit of an issue so we created them ourselves. This was a great deal of work but you can find the file available in our shop.

Finding the fonts has become a bit of an issue so we created them ourselves. This was a great deal of work but you can find the file available in our shop.

If you make a set please share them with us!
Thanks for visiting with us!


They look wonderful!!!!!
ReplyDeleteThank you...as do yours!!!
ReplyDeleteI just finished these today using the template you pointed to. I opted to paint the consonant boards as well and spray-sealed the entire thing instead of using mod-podge.
ReplyDeleteThank you for showing all the things you've made. It's really been inspiring as we start to make things for our just-turned-two year old.
I'm so happy to hear that!! I hope she enjoys them!! I'd love to see them!!
ReplyDeleteI finally got a picture up! Sorry about the bad light - it's been overcast for days. Since I haven't started a blog yet, it's on a brand new flicker stream. http://www.flickr.com/photos/55473338@N07/6291828008/in/photostream
ReplyDeleteI left a comment for you...they look so fantastic...love it!!!
ReplyDeleteThank you for the post and link to the template! I just made these and I stuck the sandpaper right in my printer and printed them on the back! It was so fast and easy!
ReplyDeleteWhat an awesome idea!!!!! Love it Cydney!!!!
ReplyDeleteHello - I've been trying to download this file but am receiving a message that the link is invalid or has been deleted. I did create an account at the share site. Has the template moved? Thanks so much.
ReplyDeleteKatherine
Hi Katherine!!
ReplyDeleteTry this one http://sporschool.blogspot.ca/2010/02/another-freebie-dnealian-template.html
Let me know if it works out:))
Firstly your site is wonderful and what you have done is inspirational...speaking of which I tried to download the template for the D'Nealian Sandpaper letters and both links I get no joy, any ideas what I could do to get hold of them.
ReplyDeleteAnd I've just finished painting my globe of the continents...when I take off my glasses it is vastly improved! but I still think it works.
Just also apart from asking about the sandpaper letters, I wanted to say 'thanks' everything is just so brilliant. Jaz in the UK x
Ok that was not so great to get the download. The other thing I can recommend is that you download your own D'Nealian font ( I have done this to make writng practice sheets) and just make you own when you print you will just change to mirror on your printer in properties. http://www.fonts101.com/fonts/view/Handwriting/24713/DnealianManuscript
DeleteIt sounds like some people had some luck...I would try to contact the blogger directly to see if she may email you the file. I hope this helps:)) I am sorry it wasn't an easy DL :(
No worries about download that happens, I'm going to ask my husband to try and download it in chrome after reading the other post, still think your site and what you do and have done is fantastic.
DeleteAgain Many Thanks :-)
Thank you!!! HA!! Mine took a fair amount of coats and fiddling to look good, but in the end it was so worth the result LOL...The links hmmm I'll take a look?
ReplyDeleteI was able to re-download the template today. I'm using Chrome, don't know if that makes a difference. The direct link to the 4shared file is: http://www.4shared.com/file/229633955/ac2ec75e/dnealian.html
ReplyDeleteThats so great!! Thanks for sharing that!!
DeleteJust a quick note....as I know the whole world was waiting in anticipation as to whether I managed to crack the download escapade...
Deleteyay my husband just managed to do it using Chrome...I'm a happy bunny although it might be sometime before I tackle making the letters, cup of tea first.
Take care and many, many thanks. Jaz x
LOL...I am so happy to hear that!!! Drink that tea, and when you get to the letters send me a link so I can see them!!!
DeleteCouldn't manage to get hold of red sandpaper, so black it is...I did manage to pick up some craft card type stuff that I was going to use for the background but I think I may wait until I can get some sheets of wood ply as it would probably look and feel better. As for taking pics my husband has the facebook things that I don't bother with and this is the only site I have posted on, so pics are a no go for my techno brain :-S
ReplyDeleteI did notice on the 'short story' at the side of the page...you had been ill, ditto re illness diagnosed and had treatment 2011, don't know why I'm mentioning that really as it doesn't change anything but stupidly just thought I'd say.
:-) Jaz
ps Again it maybe sometime before these are made as i have a million and two okay I exagerated a million and one things do too aswell, lists continually get longer instead of shorter...
All the best X
I hear ya...my list is too long already and growing:)) Black will be great...if you really wanted to you could give them a coat of paint after you cut them out but I don't think it's a must at all. These are mounted in lots of different ways also:))
DeleteYes...I was diagnosed with breast cancer at age 30 and went through a long period of chemo, surgery etc... Thank you for sharing...I really don't mind talking about it:)) All the best to you and great luck with your cards!!!
So...how were you able to print the file from Walk beside me? I've been trying to, but I just downloaded Ilivid onto my computer and I don't even know what that is and it still didn't give me the file I wanted. I'm a little confused.
ReplyDeleteYes...I am not sure why :( Up above Stephanie was able to get it using Google Chrome - was able to re-download the template today. I'm using Chrome, don't know if that makes a difference. The direct link to the 4shared file is: http://www.4shared.com/file/229633955/ac2ec75e/dnealian.html
DeleteI hope that works for you:))
These are fabulous, Cherine! I added your photo to my Inexpensive and DIY Sandpaper Letters post at http://livingmontessorinow.com/2011/12/19/montessori-monday-inexpensive-and-diy-sandpaper-letters/
ReplyDeleteThanks Deb! I appreciate that:) I'll go check it out!!
DeleteThank you so much for this! It's been such a great help.
ReplyDeleteI'm so happy to hear that!! Thank you for letting me know :)
DeleteI found your blog while searching for templates for sandpaper letters. I tried to download the template a number of times and I use chrome it does not work. Do you guys mind if I ask for the file into my email box? Thanks
ReplyDeleteThe file does not belong to me but I do have a printable with all of the sandpaper fonts that I created here. http://makingmontessorioursprintables.blogspot.ca/p/mmo-early-language.html You could try to email her. I created bot the cursive and manuscript fonts in the printable myself and it was a LOT of work so I am charging for them. Hope that helps :)
DeleteMay I ask for the template please? I cannot download it with chrome for some reason. Thank you
ReplyDeleteHi, thanks for the inspiration. What are the dimensions for your boards & where did you get them?
ReplyDeleteThe boards or card stock you use should be large enough that the child can hold the edges without blocking the letter so that they can finger trace. The cards are in various sizes depending on the letter size you use. Our cards are about 3x5". These cards were cut from Masonite that we had left over. Craft stores and art supply stores sell little plywood boards that work well. Thank you so much!!
DeleteHi,
ReplyDeleteWould love to get the sandpaper template in reverse. My computer won't let me download it from where you link to, it says it is not safe and removes it. Is there a way you could send me the file. Thanks so much.
Hi there!! I am so sorry you are having trouble downloading the file :( I paid her a visit and was able to download the template. If I created the file I could send it, but this is not the case sadly so the other option is to email her and ask for a copy directly. I hope it works out for you <3
DeleteCould you possibly do a demo on how to make the boxes? Maybe showing some step by step pics along the way? I have several items at home (some bigger - a la sandpaper letters) that I need to make boxes for. Thanks for all of the info on your site!
ReplyDeleteThank you!!! I will create a drawing of approx what we did to make the boxes. We made ours to to fit our cards.
DeleteHello Cherine
ReplyDeleteI've just met your blog and THANK YOU!!!
i know that this post is from 2011 an the blog from we could print the letters is "ofF" since but meanwhile do you know any other similar source, besides the Montessouri itself?
Thank you again even if you can't help
I spent a good deal of time creating the fonts myself because of expressed interest. I've included an image above and a link to our shop at the bottom of the post. I'm not sure who else has the templates like the one above. It's really too bad it's been so difficult to download :( I am so happy you have found us!!!!
Delete